Tour du Mont Blanc Hike : Self-Guided
Planning a Tour du Mont Blanc Hike? This self-guided guide includes maps, a 7-day camping itinerary, and essential tips to hep with the TMB trekking.
Contents
- 7-Day Self-Guided Tour du Mont Blanc: Camping & Trekking Guide
- My Own Experience: a Self-Guided Tour while Camping
- Preparing for the Tour du Mont Blanc TMB (Camping Edition)
- 7-Day Tour du Mont Blanc Trekking and Camping Itinerary
- DAY 0: How to Get There and Where to Start – Chamonix to Les Houches
- Day 1: Les Houches – Les Contamines
- Day 2: Les Contamines – Les Chapieux
- Day 3: Les Chapieux – Val Veny (Italy)
- Day 4: Val Veny – Courmayeur – Chalet Val Ferret
- Day 5: Val Ferret – La Fouly (Switzerland)
- Day 6: La Fouly – Champex-Lac – Col de la Forclaz (Toughest day!)
- Day 7: Col de la Forclaz – Refuge du Col de Balme – Chamonix
- Camping on the TMB & Budget Tips
- Common Mistakes & How to Avoid Them
- Conclusion: Is Camping on the TMB Worth It?
7-Day Self-Guided Tour du Mont Blanc: Camping & Trekking Guide
The Tour du Mont Blanc (TMB) is one of the most famous long-distance hikes in the world. Stretching over +150 km (95 miles) and crossing France, Italy, and Switzerland, it offers unbreathable views and challenging trails, but it will be worthy.
Many hikers choose to stay in mountain refuges or hotels that you need book well in advance and quite pricey, but camping along the way provides a unique and a self-guided experience. In this guide, I’ll share a detailed 7-day itinerary based on my personal experience camping every night except one. (This itinerary for the TMB can be also be done in 8 days, I will explain below on the Day 6).
This guide will cover:
- How to prepare & pack for a self-guided TMB
- Best time to hike the TMB
- A complete 7-day itinerary with campsites (or an alternative 8 day itinerary)
- Money-saving tips & campings
- Common mistakes & how to avoid them
If you’re looking to hike the TMB with your own tent, this guide is for you!
My Own Experience: a Self-Guided Tour while Camping
In my opinion doing a self-guided Tour du Mont Blanc (TMB) while camping offers a more flexible, affordable, and immersive experience compared to booking with an agency or staying in Mountain refuges.
Self-Guided TMB:
- More Freedom & Flexibility – You decide when to start, how fast to go, and where to take breaks. Mountain huts require advance bookings, and agencies follow strict schedules.
- Much More Affordable – Camping costs €15-€20 per night (or free in some spots), while Mountain huts cost €60-€80 and guided tours start at €1,200+ per person.
- Avoid Crowded Mountain huts – No noisy dorms or snoring hikers. In a tent, it’s just you. During my hike on the Tour du Mont Blanc, I met people staying in refuges who complained about how crowded they were.
- No Strict Bookings – Mountain refuges or Mountain huts get fully booked months in advance, while camping lets you stay as you arrive.
- Better Orientation & Independence – Apps like AllTrails or Maps.me help you navigate, making you a more confident hiker.
Tour Agencies might be better if…
- You don’t want to carry a heavy backpack. They take your backpack every morning and transport it by car to your final destination of the day.
- You prefer a bed, hot meals, and no tent setup. Some tours even have their own chefs cooking for the hikers when camping and set up the tents for their clients.
- You feel uncomfortable navigating on your own. Sometimes, it’s better to hike in a group to gain experience for future trips.

Preparing for the Tour du Mont Blanc TMB (Camping Edition)
Backpack & Camping Gear
To hike the TMB while camping, your backpack will be heavier than if you stayed in Mountain huts or if you organise the trekking with an agency that transport your heavy backpack. I personally aimed to keep it under 12kg (26 lbs) to avoid unnecessary strain. My backpack weighed around 10-12 kg (26.4 lbs), including my laptop and chargers, as I was working while trekking the Tour du Mont Blanc.
What to Pack for the Tour du Mont Blanc Hike:
- Tent – Lightweight, 1-2 person tent (~1.5-2 kg).
- Sleeping bag – Rated for at least 0°C to -5°C (32°F to 23°F).
- Sleeping pad – For insulation and comfort.
- Trekking poles: Quite necessary for protecting your knees on steep descents. They are also important for crossing snowy and icy sections of the trail.
- Food & snacks – Dehydrated meals, pasta, nuts, and energy bars.
- Clothes – Lightweight, quick-drying layers (waterproof jacket included) merino wool clothing.
- Hiking boots or trail runners – Well-broken-in.
- Power bank – To keep your phone and/or GPS charged.
- First aid supplies: Don’t forget to bring Band-Aids/Plasters for blisters! and any required medication you might need.
- AllTrails app or any other application that helps you navigate and follow the correct paths. While the Tour du Mont Blanc is well-marked, it’s always better to have a navigation app for support, especially if you’re doing a self-guided hike.
Tip: Test your backpack before the hike and remove anything unnecessary! (I tested mine during the UK Three Peaks Challenge and the Scottish West Highland Way, trekking 160 km (99 miles) over 5 days as part of my training.)
Food & Water
- You can buy food in Chamonix, Les Houches, Les Contamines, Courmayeur, La Fouly, and Champex-Lac.
- Water sources are available—refill your bottle whenever you find a fountain (there are many along the way), but always filter or treat the water before drinking.
Weather & Best Time to Hike
The best months to hike the TMB are:
- June – Early season, snow may still be on high passes and it can be dangerous.
- July – August – Best weather, and very little snow (meaning less risks in some mountain passes) but more crowded (although it did not bother me).
- September – Fewer people, cooler temperatures.
7-Day Tour du Mont Blanc Trekking and Camping Itinerary
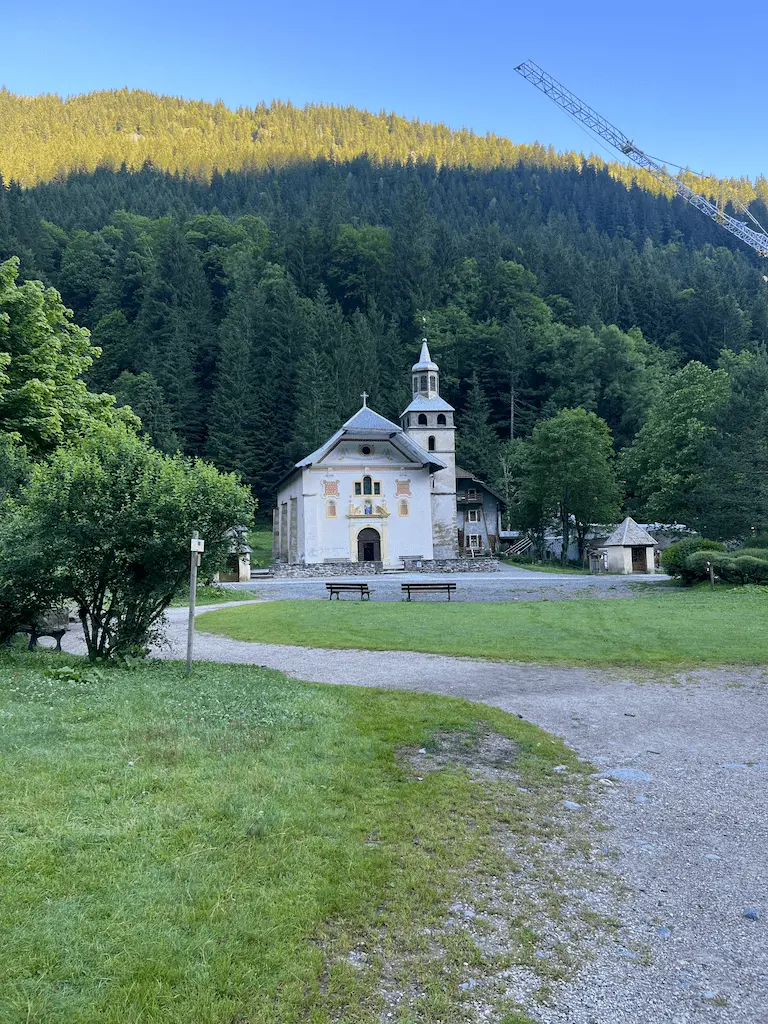
DAY 0: How to Get There and Where to Start – Chamonix to Les Houches
The best place to start the Tour du Mont Blanc (TMB) trek is Chamonix, as it has great transport connections. However, feel free to start from any other town along the route.
For our TMB hike, we took a flight to Bern (Switzerland) and then took a direct bus from the airport to Chamonix. That same day, we went to Les Houches, where we got ready to start the TMB in 7 days!
In Les Houches, there is an affordable but very basic campsite called Camping Bellevue. Make sure to buy food supplies in Chamonix or Les Houches. Although, you will finde more places in the next days but limited.
After setting up your tent, you can explore Les Houches and grab dinner at: Pub Kitsch Inn – A nice place to relax. Or La Tour De Pizz’ – You can eat there or order takeout.
The next day, your Tour du Mont Blanc hiking begins!
Day 1: Les Houches – Les Contamines
- Distance: ~18 km (11.2 miles)
- Elevation gain: ~1050m (3,445 ft)
- Estimated time: 6 hours 30 minutes
- Where to camp: Camping le Pontet
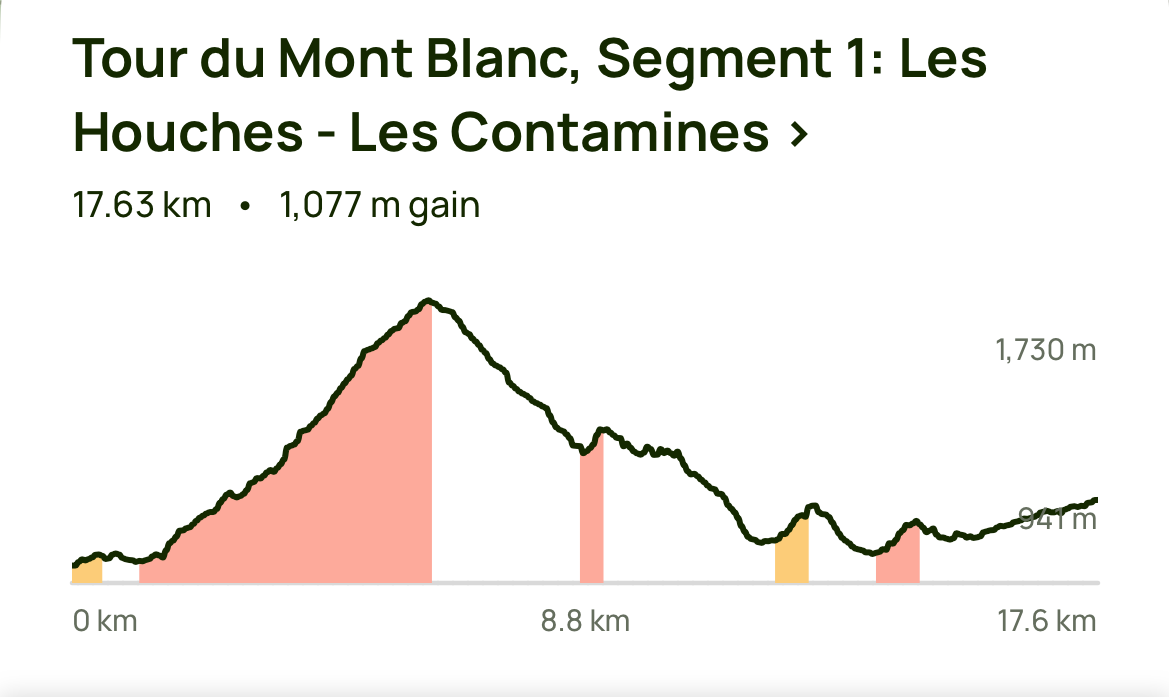
Start from Les Houches and follow the trail to Col de Voza. This is a great spot to rest and grab a snack before continuing. After the col, the trail descends into the valley towards Les Contamines, passing through several small villages along the way.
In my opinion, this first stage is of medium difficulty, making it a great warm-up for the more challenging days ahead.
Once you reach Les Contamines, you can stop for lunch here before heading to Camping le Pontet, located outside the town. This campsite offers good shower facilities and has a bar where you can relax after your first day on the trail.
Day 2: Les Contamines – Les Chapieux
- Distance: ~18.2 km (11.3 miles)
- Elevation gain: ~1364m (4,475 ft)
- Estimated time: 7-8 hours
- Where to camp: Open camping near Les Chapieux

Make sure to start early, as this is one of the longest and most challenging days on the Tour du Mont Blanc.
This stage includes:
- A stop at Notre Dame de la Gorge.
- Crossing the Old Roman Bridge (Pont Romain).
- The climb to Col du Bonhomme (2,329m / 7,641 ft), offering stunning views.
Once you reach Refuge de la Croix du Bonhomme, you can rest, eat, and refill water. (In my opinion, food here is very expensive, so it’s better to carry your own snacks.) After the refuge, you’ll begin the long descent to Les Chapieux—tiring but with amazing views.
Finally, you’ll reach Aire Naturelle de Camping, where you can set up your tent. (Note: There are no showers, only public toilets, but you can swim in the nearby river for a refreshing wash.) Near the camping area, there is a small shop where you can buy basic food supplies. And If you’re craving a hot meal, there’s also a pizza place nearby.
Keep in mind that in Les Chapieux, there is no internet signal for your phone.
Day 3: Les Chapieux – Val Veny (Italy)
- Distance: ~20.8 km (12.9 miles)
- Elevation gain: ~1100m (3,609 ft)
- Estimated time: 7 hours
- Where to camp: Camping Hobo Val Veny
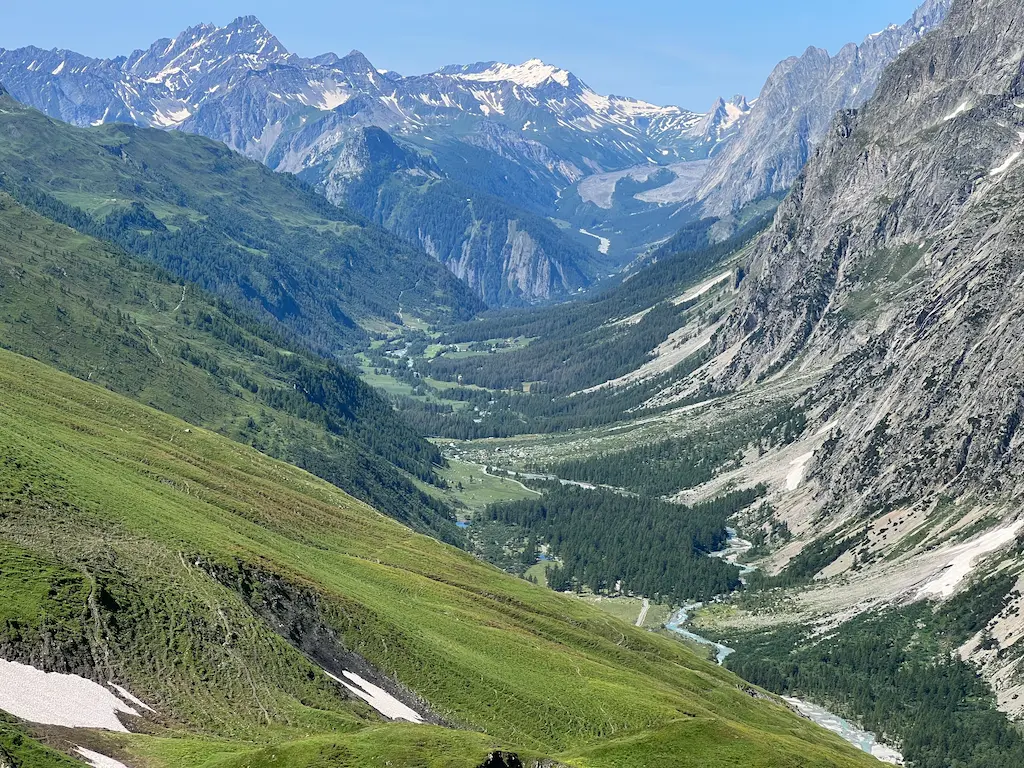
Today begins with a walk through the Valley of Glaciers, leading to Refuge des Mottets. From here, you will cross into Italy via Col de la Seigne (2,516m / 8,255 ft), the highest point on the TMB. After crossing the pass, the trail descends through Rifugio Elisabetta and into Val Veny, which offers some of the most spectacular mountain scenery in the Aosta Valley.
You can camp at HOBO Camping Val Veny, which, in my opinion, is one of the best campsites on the Tour du Mont Blanc. It has hot showers, a bar, a cantina area, and a small shop where you can buy some provisons.
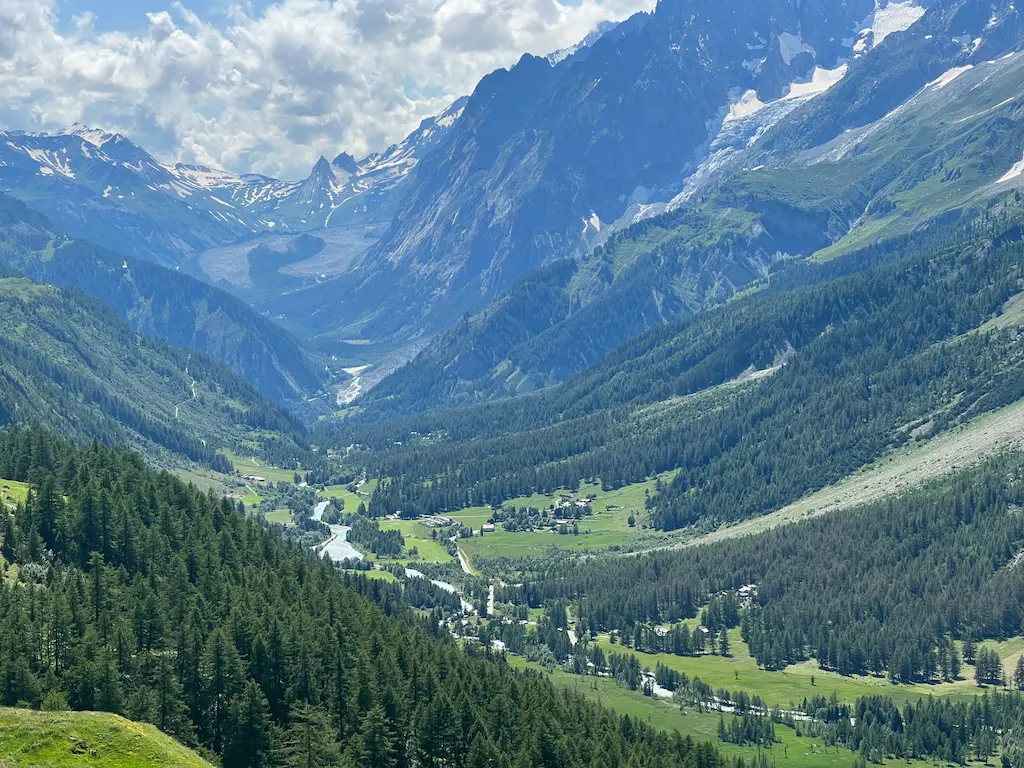
Day 4: Val Veny – Courmayeur – Chalet Val Ferret
- Distance: ~17.5km (10.9 miles)
- Elevation gain: ~1230m (4,035 ft)
- Estimated time: 6 hours 30 min
- Overnight: Chalet Val Ferret
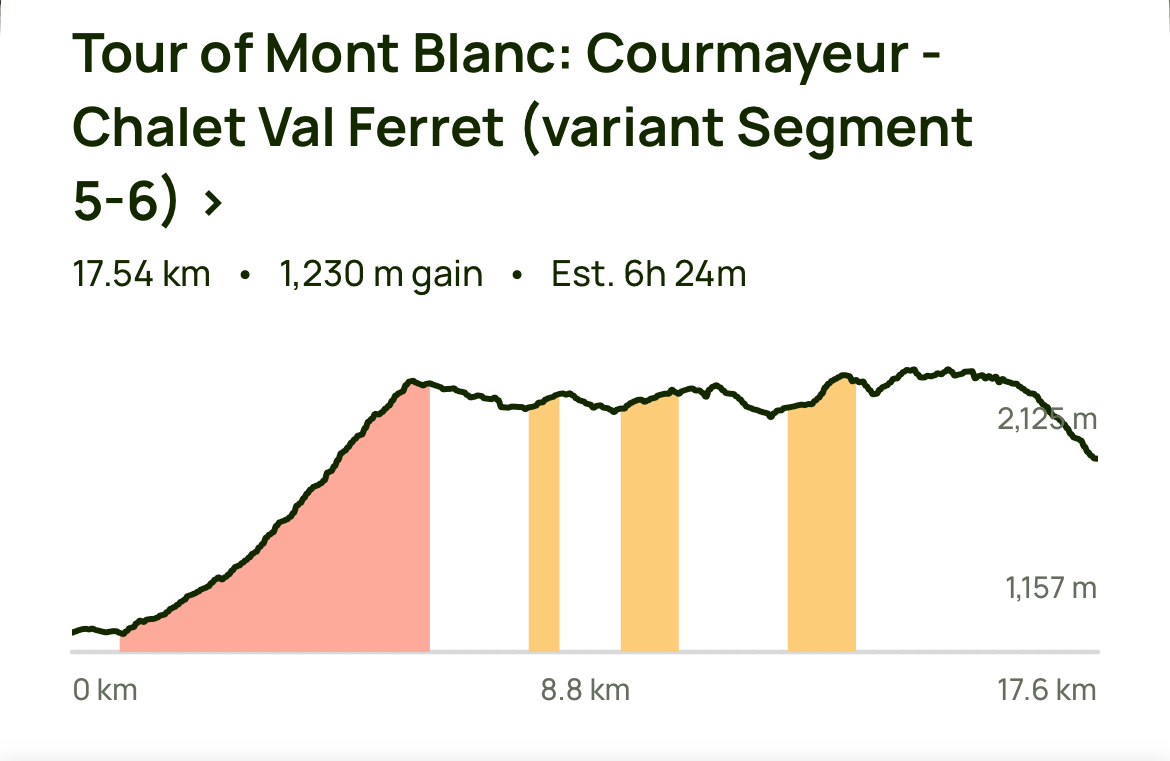
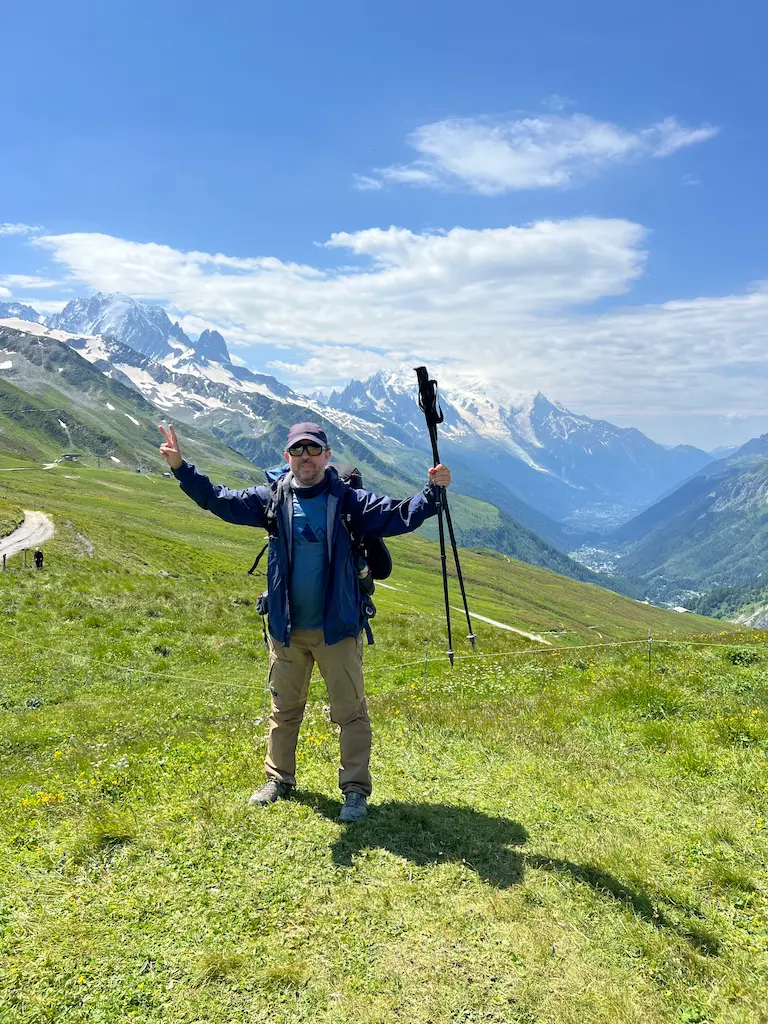
You can either start from your campsite in Val Veny (adding 5 km / 3.1 miles) or take a short 10-minute bus ride to Courmayeur. From Courmayeur, you’ll continue through the Aosta Valley, hiking up to Rifugio Giorgio Bertone, followed by a beautiful trek to Rifugio Bonatti, one of the most astonishing spots on the Tour du Mont Blanc hiking. Take your time to relax and capture some photos.
Important:
This is the only night we did not camp. Instead, we stayed at Chalet Val Ferret, where you can enjoy a private room and a hot shower. Dinner was included, and it was really good—after four days of hiking, it was definitely worth it in my opinion.
Other Accommodation Options:
- If you prefer to camp, you can return to the Val Ferret valley and stay in a campground. The next morning, you can take a bus back to the same starting point. However, camping options in this area are very limited. OR
- Another option is to stay at Rifugio Bonatti (book well in advance), but this means you’ll walk more kilometers the next day, OR
- Extend today’s hike and stay at Rifugio Elena instead. But you will cover more distance this day.
The Chalet Val Ferret and the Mountain refuges need to be booked well in advance. However, based on my personal experience, we were lucky and managed to book at Chalet Val Ferret because some people canceled on the same day.
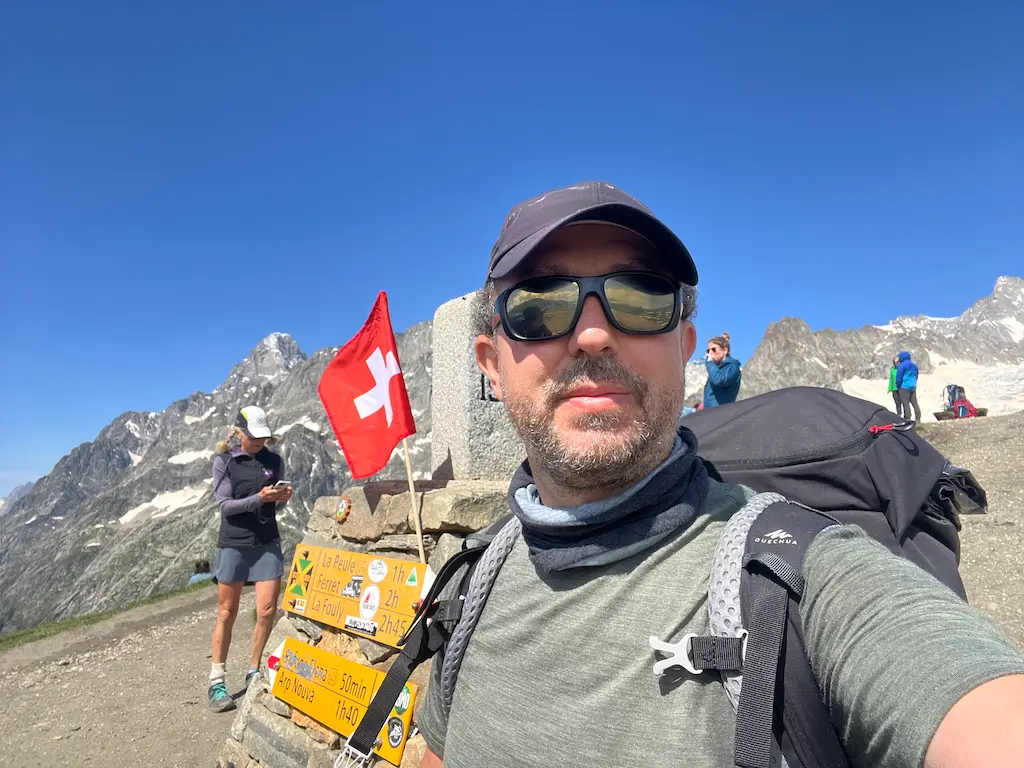
Day 5: Val Ferret – La Fouly (Switzerland)
- Distance: ~12.2 km (7.6 miles)
- Elevation gain: ~800m (2,625 ft)
- Estimated time: 6 hours
- Where to camp: Camping des Glaciers, La Fouly

Start the day from Val Ferret, climbing over Grand Col Ferret via Rifugio Elena, crossing into Switzerland. The descent takes you to Chalet de La Peule, where you can stop for a drink, use the bathroom, and take a short rest.
The walk down to La Fouly is long but easy. Once in La Fouly, you’ll find a supermarket, making it a great place to restock your food supplies before heading to Camping des Glaciers—a nice camping with good shower facilities and commom cantina area.
Day 6: La Fouly – Champex-Lac – Col de la Forclaz (Toughest day!)
- Distance: ~30 km (18.6 miles)
- Elevation gain: ~1420m (4,659 ft)
- Estimated time: 8-9 hours
- Where to camp: Camping de l’Arpille (next to Hôtel du Col de la Forclaz)
This was the hardest day of the Tour du Mont Blanc, mainly due to how we organized our stages. Many hikers split this stage by camping at Champex-Lac and continuing the next day. If you have the time, I highly recommend dividing this stage into two days. So here , let me elaborate the two options:
Option 1: Splitting this stage into two days
- Day 6A: La Fouly → Champex-Lac (~17 km)
- Day 6B: Champex-Lac → Col de la Forclaz (~13 km)
This makes the first part very easy, but the second part is still challenging.
Option 2: Completing this stage in one day (What we did)
Part 1: La Fouly to Champex-Lac
The day starts with a descent into the valley, followed by a moderate climb to Champex-Lac. Once in Champex-Lac, you can relax by the lake. If you prefer to stop here, there is a Camping in the town. If you decide to continue, eat some snacks and get ready for the second part.
Part 2: Champex-Lac to Col de la Forclaz
Since we aimed to finish the TMB in 7 days, we continued our trek after Champex-Lac. This part was personally the hardest one for me, maybe as i was already tired of the full Tour du Mont Blanc trekking. The route takes you through Alpage de Bovine, try to arrive before 2pm so you can have a drink after all the climbing, a perfect place to relax if it is sunny. We finished the day at Col de la Forclaz, you can camp next to Hôtel du Col de la Forclaz.
You can walk further and end in Trient, but we had a very long day already. The hotel provides a small camping area with showers and toilets. Across from the hotel, there is a small shop where you can buy food for the last day. Note: There is no bar at this campsite, but you can use the hotel cafeteria for meals or drinks.
Day 7: Col de la Forclaz – Refuge du Col de Balme – Chamonix
- Distance: ~18 km (11.2 miles)
- Elevation gain: ~1140m (3,740 ft)
- Estimated time: 7 hours
- Where to camp: Camping de la Mer de Glace
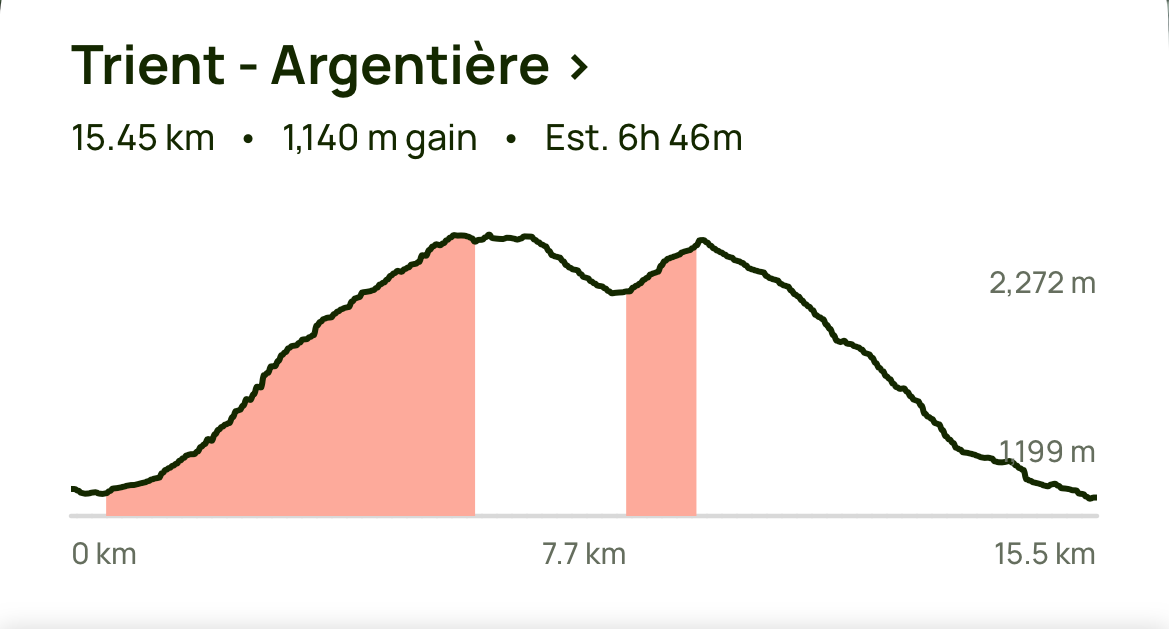
Our last day on the Tour du Mont Blanc! Although there is a significant elevation gain, this stage is mostly downhill, making it an easier day overall.
We started from Col de la Forclaz towards Trient. Then we hedaded to the final climb to Col de Balmes. Make sure to stop at Refuge du Col de Balme, where you’ll officially cross back into France. From here, you’ll begin the final descent, passing through several small villages like Le Tour, Montroc, and Argentière (where we stopped for lunch and also found supermarkets).
Finally, we made it back to Chamonix, where we stayed at Camping de la Mer de Glace (Good shower facilities, laundry and common areas. In Chamonix, you’ll find a wide range of accommodation options, from campgrounds to hotels.
If you followed this guide for the Tour du Mont Blanc Hike: Congratulations, you completed the TMB!
Camping on the TMB & Budget Tips
- Camping Les Contamines (France) Camping le Pontet
- Les Chapieux: (France) Open camping near Les Chapieux
- Camping Hobo Val Veny (Italy) Camping Hobo Val Veny
- Camping des Glaciers (La Fouly) (Switzerland)
- Camping de l’Arpille (next to Hôtel du Col de la Forclaz)
How to Save Money on the TMB
- Camp instead of staying in Mountain huts (€15-20 per night vs. +€80).
- Buy food in supermarkets, and avoid refuges and mountain huts.
Common Mistakes & How to Avoid Them
- Overpacking – Try to Keep your backpack under 10kg (26lbs).
- Not checking the weather – Conditions can change fast. If you are going to have bad weather while crossing the highest peaks of the route, you might consider to rest one day and retake your TMB hiking the next day.
- Underestimating the difficulty – It’s not just a walk, train beforehand. Try other multi-day hikings while carrying your tent for a few days before undertaking the Tour du Mont Blanc trekking.
- Bring Trekking poles and also consider if you will need snow crampons. Some sections of the trail could have snow or ice.
- Start Early: If you are doing a self-guided Tour du Mont Blanc, start very early in the morning (around 5 AM or 6 AM) and aim to reach your next camp before 5 PM.
- Research and Maps: Before starting the Tour du Mont Blanc, do your research thoroughly, study the maps, create a plan, and have a Plan B for each day.
Conclusion: Is Camping on the TMB Worth It?
Absolutely! Camping on the Tour du Mont Blanc allows you to:
- Save money compared to staying in Mountain huts.
- Have more flexibility with your schedule.
- Walk at your own pace.
If you’re up for the challenge, this 7-day camping itinerary will give you an epic adventure while staying self-guided. Are you ready to take on the Tour du Mont Blanc with a tent?
Feel Free to ask any questions about our experience that can be helpful for you.
